Creating high-quality video content used to be the domain of professional studios and big brands. Today, however, anyone with a smartphone and a story to tell can craft compelling videos that captivate blog audiences and supercharge engagement. But how do you actually get started—especially if you’re a beginner with limited experience, equipment, or budget? This beginner’s guide will walk you through every key step, demystifying the process and setting you up for video success on your blog.
Why Video Content Elevates Your Blog
It’s no secret that video is king in the digital world. In 2023, people watched an average of 17 hours of online video per week, according to a Wyzowl survey. Blog posts featuring videos attract up to 3 times more inbound links and see a 157% increase in organic traffic compared to text-only posts. But what makes video so effective on blogs?
- $1: Readers spend 2.6 times longer on pages with video content. - $1: Viewers retain 95% of a message when they watch it in a video, compared to just 10% when reading text. - $1: Google prioritizes multimedia-rich pages, making your blog more discoverable. - $1: Videos are shared 1200% more than links and text combined on social media.If you want to keep your blog fresh, interactive, and competitive, video content is no longer optional—it’s essential.
.png)
Planning Your Video: From Idea to Script
Every successful video starts long before the camera rolls. The planning phase is where you define your goals, understand your audience, and lay out your content structure. Here’s how to do it as a beginner:
1. $1 - Are you educating, entertaining, demonstrating, or telling a story? - Example: A food blogger may create a recipe demo, while a travel blogger might share a destination highlight. 2. $1 - What are your readers' pain points, interests, and questions? - Use analytics tools to pinpoint popular topics and search queries. 3. $1 - Tutorials, vlogs, interviews, behind-the-scenes, or explainer videos. - Start with what feels natural—authenticity resonates! 4. $1 - Even a basic structure will keep your message clear and concise. - Include an engaging hook, key points, and a call to action. - Keep videos short: Wistia found that engagement drops sharply after 2 minutes. 5. $1 - Sketch out key scenes or shots if your video is complex.A little upfront planning will save you time during filming and editing, and it ensures your video content aligns with your blog’s goals.
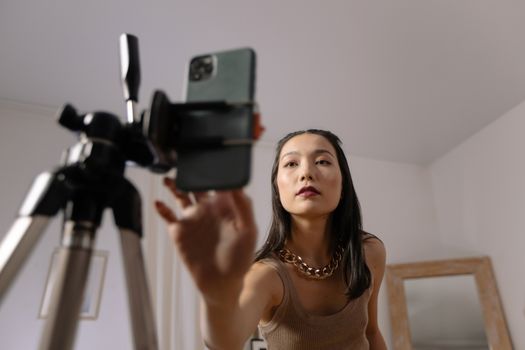
Recording Basics: Gear and Set-Up for Beginners
You don’t need a Hollywood studio to produce effective video content. Many top bloggers started with nothing more than a smartphone and natural light. Here’s what you need to know about gear and set-up:
- $1: Modern smartphones (iPhone, Samsung Galaxy, Google Pixel) shoot in HD or 4K. Entry-level DSLRs and mirrorless cameras are also affordable options. - $1: Audio quality matters! A $20 lapel mic or smartphone-compatible external mic can make a huge difference. - $1: Natural light is your friend. Face a window or shoot outdoors. For indoor filming, consider a budget ring light. - $1: Keep your shots steady with a simple tripod or smartphone holder. - $1: Choose an uncluttered, relevant backdrop. A clean desk, kitchen counter, or outdoor scene works well.Here’s a quick comparison of basic gear options for beginners:
| Equipment | Budget Option | Mid-Range Option | Estimated Cost |
|---|---|---|---|
| Camera | Smartphone (HD/4K) | Canon EOS M50 | $0–$600 |
| Microphone | Boya BY-M1 Lapel Mic | Rode VideoMicro | $20–$70 |
| Lighting | Natural Light | Neewer Ring Light Kit | $0–$80 |
| Tripod | UBeesize Tripod | JOBY GorillaPod | $15–$50 |
You can get started with as little as $50–$100, or use equipment you already own.
Filming Techniques: Making Your Videos Look Professional
Even with basic gear, a few simple techniques can dramatically boost your video quality:
- $1: Use a tripod or place your device on a stable surface. - $1: Face towards your main light source to avoid harsh shadows. - $1: Use the “rule of thirds”—place yourself or your subject slightly off-center for visual interest. - $1: Record in a quiet space, and speak clearly. Test your audio before filming the whole video. - $1: Record short clips and change camera angles for variety. - $1: Beginner videos are best kept under 3 minutes to maximize engagement. - $1: Smile, use hand gestures, and show enthusiasm—viewers respond to energy.Don’t worry about perfection. Authenticity and a clear message matter more than studio-level production. Many viral videos were shot in a single take on a phone!
Editing Your Video: Easy Tools and Tips
Editing transforms your raw footage into a polished final product. For beginners, user-friendly software and apps make this step accessible:
- $1: - iMovie (Mac/iOS) - Windows Video Editor (Windows 10/11) - CapCut (iOS, Android, Desktop) - DaVinci Resolve (advanced, but free) - $1: 1. $1: Remove mistakes, pauses, and off-topic sections. 2. $1: Use simple text overlays for clarity and accessibility. Over 85% of Facebook video is watched without sound. 3. $1: Use basic fade-ins and fade-outs. 4. $1: Choose copyright-free background music from YouTube Audio Library or similar sources. 5. $1: MP4 is widely supported and strikes a good balance between quality and file size.Editing can seem intimidating, but start simple. As you gain confidence, experiment with split screens, cutaways, and effects.
Uploading & Embedding: Sharing Your Video on Your Blog
Once your video is ready, you need to share it in a way that maximizes reach and engagement. Here’s how to do it effectively:
1. $1: Most bloggers use YouTube or Vimeo. YouTube is free, supports SEO, and reaches a vast audience. Vimeo offers more customization and is ad-free. 2. $1: - Use keyword-rich titles and video descriptions. - Add relevant tags and a custom thumbnail. - Include a call to action and a link to your blog. 3. $1: - Use your platform’s embed code (WordPress, Squarespace, Wix, etc.). - Place the video near the top of your post for maximum visibility. - Add a brief summary or key points below the video for readers who prefer text. 4. $1: - Share on social media, email newsletters, and relevant forums. - Encourage comments and shares to boost discovery. - Repurpose clips for Instagram Reels, TikTok, or Facebook.Remember: Videos under 2 minutes get the most engagement, but for educational content, up to 6 minutes is acceptable if the material is valuable.
Measuring Success: Tracking Your Video’s Performance
To improve your video content, you need to know what’s working and what’s not. Most hosting platforms and blog analytics tools provide key performance metrics:
- $1: Tracks views, watch time, audience retention, and traffic sources. - $1: Measures how long visitors stay on your blog’s video posts. - $1: Comments, shares, likes, and click-through rates signal what resonates.Here are some starter benchmarks for beginner video bloggers:
- $1: Aim for at least 40-50% of your video’s length. - $1: 2–5% is typical for YouTube thumbnails. - $1: Over 1% (likes, comments, shares divided by total views) is a solid start.Use this data to refine future videos. Did viewers drop off early? Try a shorter intro or more dynamic visuals. Did certain topics get more comments? Consider creating a series on that theme.
Final Tips for Creating Video Content as a Beginner Blogger
The world of video content can seem overwhelming, but remember: every successful creator started as a beginner. The most important factor is getting started—don’t wait for perfect gear or flawless execution. Consistency, authenticity, and a willingness to learn will serve you far better than a fancy camera.
Start small, experiment, and invite feedback from your audience. Over time, you’ll develop your own style, improve your editing skills, and discover what resonates with your viewers. Video content is a journey—embrace the process, and you’ll see your blog’s reach, engagement, and authority grow.